Showing posts with label crochet. Show all posts

Wednesday, April 17, 2024

The Tucson Chill Top Tutorial


Hello, I am looking forward to sharing my latest project with you. I call this the Tucson Chill Top. It's kind of a weird name, but here's the story:

One of the things I love about living in Tucson is the laid back nature. When we first started coming here, my husband and I began referring to this general feeling as Tucson Chill (our own personal proper noun). We would roll into town, let our stress fade away, and lean into this state of chill. I designed this relaxed, drop shoulder, dolman style top to emanate Tucson Chill. The gentle ribbing adds some stretch to the overall relaxed and breezy fit (very important in the desert). It has a nice, classic crew neck and puff sleeves that stop just above the elbow. It’s perfect for work or play, but I hope it inspires a state of Tucson Chill wherever you call home.

The video tutorial will be released on my channel in two parts. I post my tutorials on Tuesdays, so Part 1 of the Tucson Chill top will come out on April 23rd. I am sharing this design in such a way that everyone will be able to customize it to their preferred length and width. I would love to have you join me and embrace the Tucson chill.
 

Thursday, February 22, 2024

The Teddy Bear Crossbody Bag - Brand New Pattern!

Teddy Bear Crossbody Bag
It's finally here! The Teddy Bear Crossbody Bag pattern is launched!  Launched is a dramatic word, but this bag felt like quite the undertaking. It marks the beginning of my new goal of not only selling patterns, but producing videos. I have been hard at work, filming and editing what I hope will be the first of many tutorials. Yes, you'll be able to make this cozy sling from start to finish by following along with the video. 

I feel like I'm getting a little ahead of myself. The pattern is available now in my Etsy shop. The complete video tutorial will be coming out on March 5th on my YouTube Channel. I've had so many requests for videos over the years, and I just didn't have the time to invest until now.

I'm very excited to be able to offer my designs in two formats. As a crocheter, I love an instant download that I can reference anytime from anywhere. I must confess that I have an old school affection for printing out a physical pattern and carrying it around with me. At the same time, I am just as likely to hop on YouTube to learn a thing. I love having choices and I hope you will too!

This brown version is the one I filmed myself crocheting for the video. I have to keep it real and tell you that I've been putting in long hours and ending each day with my brain feeling pretty fried. While I've done a few little projects in the past, mostly using my phone or iMovie, I decided it was time to tackle Final Cut Pro. I am thankful for all the ways it reminded me of iMovie, but there was a lot to learn!

In fact, the list of things I've been learning lately is long. I made a short animation in Procreate. I've had to educate myself about sizing and formats. I made a special thumbnail because that's a thing now. Just when I thought I was out of the woods, I discovered that iPhones are now producing High Efficiency Image Files instead of jpegs. 

Everyday I have stumbled onto more questions to research. I am very grateful that the answers are never too hard to find, but it has absolutely slowed me down.


 So I have been feeling like a beginner these days. From time to time, I get frustrated with just my own lack of knowledge around these new tools, but I am trying to be patient with myself as I learn. It feels amazing to have my first project complete and ready to share. The first one has to be the hardest, right?


Thursday, December 7, 2023

Hello Old Blog

 I'm doing it.  I am diving back into a blogging practice. For the past few years I have been much more of a consumer than a producer of social media content. I am going to resist the urge to reflect on the past and just focus on the present. 

What is present day me up to?  Well, I'm pretty excited because I am going through my own creative renaissance.  For the first time in my life, I have a proper studio and not just a small room hidden away in my home.  This space is a dream come true. Everyday when I gaze upon the Great Wall of Yarn, the proper name I have given to my stash, I feel pure joy.

I am also feeling very inspired. I love that crochet is going through its own renaissance and I have been voraciously consuming the content of so many talented creators on YouTube. It is both exciting when your favorite art form has become insanely popular and a little intimidating. Even after decades of crocheting and designing, I could not help but wonder if there is a place for me among so many others. 

Of course I think there is room for everyone and we each have our own interesting perspective to offer. Still, I had to figure out what I want my contribution to be going forward. I feel like there are already people crushing it in terms of teaching the basics. What I have decided to do is to simply put my crochet patterns out there on video because it is how we all love to learn. I also like the idea of having my designs on film and free for all to enjoy if they choose.  My resolution for the new year is to get started on this path.

I have so many ideas for updating old projects and for new ones. I also enjoy following trends and pondering how I could make crocheted versions of the styles and accessories I love. Case in point, I was in Anthropologie and was so drawn to the Sherpa Crossbody Sling. It's furry and fun and versatile. I like that it looks great as a shoulder bag, but can also be worn as a shorter, crossbody bag. I love being hands free when I am out and about, so I love a good crosbody bag. 

All this being said, the price tag of Anthropologie's bag is a pretty big ouchy and it's also just fun to see if you can dup a thing. To the left is my prototype made up in a boucle, but I have finally found the perfect fur yarn, so I am excited to get back to work and finalize my design. Yes, there will be a pattern and eventually a video too. Yay!

Did I just "yay" myself? Sorry, I'm excited. Right now I am doing what I suspect everyone else is doing. I am Decembering it up with decorating, gift making, and holiday baking. I will see you soon with more from the studio. I have much to figure out in terms of making videos. I have never really leaned in hard to this medium aside from some simple companion videos for patterns. It's time to modernize my tech and develop my process. Oh my! Help?!

Monday, May 20, 2019

New Hooded Baby Blanket Pattern

https://www.etsy.com/listing/707628695/crochet-hooded-baby-blanket-pattern?ref=shop_home_active_2
I get so much satisfaction from publishing patterns.  Every time I publish one, I feel a surge of motivation and I tell myself that I need to set firm goals and get more done.  My good intentions are usually waylaid by general life stuff, so I guess I need to learn to coast on the high I feel when I actually do publish.

Do you ever wonder what goes on behind the scenes of small craft businesses?  I do all the time.  When I see a particularly great photo, I wonder how many shots it took to get that great one.  How many different set-ups did they try? Where did they find that model?  We in the crafting world have all had to become our own photographers and marketers which I always think is the hardest part.  I daydream about a magical intern who will do all my pictures and listings for me so I can spend all of my time designing.  Alas, it is all on me and not just me I fear.  When you are the offspring of a pattern designer, chances are about 100% that you will get roped into helping out.  

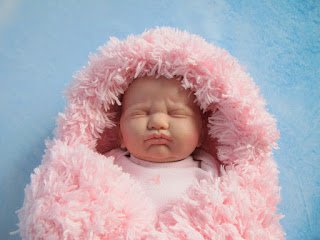
I have two son's, so they manage to escape quite a bit by virtue of being the wrong gender for much of what I make.  However, I am not shy about enlisting them for help. I have to giggle when I think that part of their childhood memories will be some of the weird things I have asked them to do for Wind Rose Fiber Studio. For instance, just yesterday, I had my 19 year old son hold a life-like baby in his arms so I could get a picture of my Hooded Baby Blanket for the pattern.  The poor guy had to sit there and play daddy with a baby doll and he was such a good sport.  I love my kids!


https://www.etsy.com/listing/707628695/crochet-hooded-baby-blanket-pattern?ref=shop_home_active_2
I guess I should share a bit about the pattern while I'm here.  I wanted to make something super soft and fluffy so people could use it as a prop for precious new baby pictures.  At the same time, I wanted it to be practical.  After toying with a few ideas, I remembered my kids old hooded bath towels and how cozy they were.  It was fun to wrap them up after a bath from head to toe and let them snuggle. I decided to make the same kind of thing only as a furry blanket. You can burrito up a baby with hood included or just use it as a nursery blanket. While the pattern is not difficult, it can be a challenge to work with fur yarn.  You need to be able to feel for where the stitches go, but as long as you are comfortable with a crochet hook, the Hooded Baby Blanket should be a quick and easy pattern.

Thursday, April 18, 2019

There Is a Better Way, But I'm Doing it This Way Anyway

There is a better way to do this thing I'm doing, but I'm going to go ahead and do it this other way anyway. This sounds crazy and yet with almost every design I undertake, I find myself thinking this kind of thought.  It's different from second-guessing or some sort of crisis of confidence, but rather my brain telling me that there is another way of doing the thing I'm doing that would be even better. I will ignore this intelligence and continue on, very often wasting some of my own precious time as well as yarn which I would argue is also precious. 

Case in point, my current project is a baby blanket for my nephew's first.  My idea is to take a classic doily pattern and make it up in a soft, baby yarn, modifying it just a little to take out some of the larger spacing in the design so that it would serve well as a blanket. The idea is sound, even kind of fun and appropriate for my vintage loving nephew and his wife, but as I work up the blanket, I know it would represent better in a solid yarn and better still in one with a less fluffy texture.  Yet here I am, ignoring my own reasoning and working through with my initial yarn purchase.  The best thing you can say about this variegated, furry yarn is that the colors will be appealing to the indented recipients and it has an impressionist air which will probably even present the suggestion of lace when complete. Even so, I know deep down that I will end up crocheting the whole piece over again and this will become something taking up space in my studio or at best, donated to a charity which will have no idea what it is supposed to be. 

Why do I do this? 
Do I want to prove myself wrong? 
Is it because I can't abandon a project once I've begun?  
Will writing this phenomena down create personal change?

Honestly, I think this is just a shout into the void, an existential "why?" and one of many I have about myself and my creative brain. Perhaps I'm just wondering if anyone can relate. 

I'll come back and share my finished baby blanket, both of them. 

Wednesday, April 10, 2019

Daydreamer Dolman Sweater Pattern and More!

https://www.etsy.com/listing/677345268/daydreamer-dolman-sweater-crocheted?ref=shop_home_active_9
I was just reading my last blog post from September of 2018.  That's right, September! Blimey it's been a long time!!!

At least let me follow up my last ancient post.  Since the fall of last year, I have managed to get a couple projects done.  The Daydreamer Dolman Sweater is my brand new pattern that has been months in the making.  I really wanted to design something to showcase all of the fun, cake style yarns on the market. This was made using Caron Latte Cakes and I just love how the colors present themselves in cool, geometric patterns. Of course you could go solid or design your own.  I made
up this second one with short sleeves using Yarn Bee's Fur-Ever Style and trimmed it out with a pretty blue from my stash.  This one is lighter weight and a nice layer to throw on over a tank.  It's worked in a free size for all of us fans of loose, comfy clothes. 


So that's my big new pattern, but in my last post I was talking about my All Wrapped Up in Circles & Squares Applique and how I was working on project using this motif.  I ended up assembling two of the 10" squares and designing a handbag.  All of the details can be found on Instagram by searching #circlesandsquaresbag You can find me on Insta @jennofwindrose and here is what the finished project looks like...


Cute, huh?


https://www.etsy.com/listing/678940304/recycled-sari-silk-sliver-top-sari-silk?ga_search_query=Sari%2Bsilk&ref=shop_items_search_1&frs=1
I guess I have one last share before I call it a night.  I recently found a source for really nice quality Recycled Sari Silk Sliver.  It is free of little threads and bits that are commonly found in recycled sari silk so its pure pleasure to spin.  If you love all of the gorgeous and somewhat random colors that can be found in recycled sari silk, you will go crazy for this fiber.  Oops, can't forget the pic!

Okay, I am going to call this Wednesday done.  Hope life is treating you well!!


Wednesday, September 19, 2018

All Wrapped Up in Circles and Squares - New Crochet Patterns

All Wrapped Up in Circles and Squares is the name of my latest pattern, but it also feels a bit like my mental state, at least the "all wrapped up" part.  With one child in grad school and the other starting under grad, I have achieved a level-up of sorts.  I'm greeting my newfound autonomy with over-eagerness, jumping into all of the projects that I have been promising myself I would do if I had a little more time. I have wrapped myself up in all of them.  

https://www.etsy.com/listing/626238161/the-tulip-mandala-crochet-pattern?ref=shop_home_feat_3
Of these myriad projects, was the goal to design and publish more patterns.  For starters, I had an idea to design a mandala, only to find out that they have been all the rage for at least a couple years.  How did I get so out of touch?  Oh well, I designed my mandala anyway.  I call this the Tulip Mandala.  There are subtle little flowers worked into the pattern.   


https://www.etsy.com/listing/633713905/lotus-flower-applique-crochet-pattern?ref=shop_home_active_16
After the mandala, I decided I wanted to create a lotus flower in profile.  You see plenty of crocheted lotus flowers, but they are typically an overhead view.  They start at the center and work their way out to the petals.  Crocheting in the round lends itself to flowers made this way, but I have always loved that iconic lotus in profile, so I created an appliqué to be used as a centerpiece or embellishment.  Here's my Lotus Flower Appliqué.


I guess after the lotus flower, I must have been on an applique kick, because that's when I designed my latest motif, All Wrapped Up in Circles and Squares.  The inspiration for this design came from some old fashioned yarn play.  I was stuck on a plane, so I pull out a hook and a skein of yarn (never leave home without the essentials) and just started to noodle or doodle or whatever it is we yarn people do.  I ended up with a circle where the outer ring was a fully wrapped round of stitches.  It was overlay and underlay.  It had texture and what I think of as a stained glass effect, colors peeking out between lines. I did not know how I would use it, but I knew I had to turn it into something.  

https://www.etsy.com/listing/644167189/all-wrapped-up-in-circles-squares?ref=shop_home_active_1

When I sat down to work with my new shape in earnest, I thought, "What if the circle becomes a square?" I turned my wrapped circle into a square and then I turned it back into another wrapped circle, and then again a square.  It was a challenge to write, a brain teaser of sorts.  It's easy to crochet in the round and it's easy to make a square, but going back and forth was something new, at least for me.  In the end, I had a nice, big 10" square.

Currently, I'm working on designs utilizing the All Wrapped Up in Circles and Squares motif.  I'm giving the first tutorial away CAL style on Instagram.  You can find all of the posts by searching #circlesandsquaresbag and you can find me on Insta @jennofwindrose

Sunday, May 13, 2018

The Tall Muk Luks Pattern is Here!


https://www.etsy.com/listing/614095419/tall-muk-luks-slipper-socks-crocheted?ref=shop_home_active_1 I have been crocheting my Tall Muk Luks for well over 13 years now, but making something, and writing a pattern for that same something, are two very different enterprises.  I have gone through quite a few versions on my path to this final product.  The Tall Muk Luks are so beloved to me that I could not bring myself to publish a pattern for them until I was truly happy with my work.  The day is finally here and I am so pleased to be able to share this pattern with you!  The Tall Muk Luks Pattern is available in my Etsy store and more details on the pattern can be found in the listing.  It's a challenging crochet for intermediate to advanced skill levels, so if you are a beginner, find an experienced helper.  I've included 27 pictures in this mammoth of a pattern to carry you through to success!

Saturday, July 15, 2017

Fiberpunk Beads

If intentions were blog posts, you would hear from me often, but today I am making good and turning my thoughts into typed words.  

I have been having fun in my studio playing around with my Fiberpunk Beads and I've started to make sets of them for other jewelry makers to explore.  I am hoping they will find their people and be used in new and inventive ways. 

I'm starting out by creating sets in solid colors.  Each one contains a large pendant, a tube, 6 spacers and three extenders.  I hope I have chosen components that will be assets to any design, but once I have a good variety of these kits, I'll branch out.  

https://www.etsy.com/listing/541797927/fiberpunk-beads-turquoise-blue-11-piece?ref=shop_home_active_3
I love the texture fiber adds to jewelry and the way it contrasts the hardness of metal.  The beads I'm making are a combination of tatting and crochet and I'm trying to create designs that are out of the ordinary.  When you look at these beads do you see earrings or a pendant necklace?  Maybe you see a multi-strand bracelet or embellishments that can be sewn on like appliqués.  Most of all, I hope you see possibilities!

Tuesday, January 10, 2017

Spinning and Dyeing Gift Baskets

I've added something new to my little shop at Wind Rose Fiber Studio.  It came to me one morning in December, that it would be fun to make gift baskets.  While I plan to carry them year round, I'm sure this idea was motivated by the holiday season.  It tends to be the time of year when people are shopping for loved ones.  I thought it would be nice to have something all thought out, wrapped up and ready to give. 

I ended up designing 7 gift baskets in all.  I made three for spinning:  one with 19 micron Merino in Vermillion, Leaf and Orchid, one with natural fibers Organic Polwarth, Mixed BFL and Merino, and another 19 micron Merino basket with Cardinal, Ginger and Cyan.  They all come with a top whorl drop spindle and a set of detailed instructions for learning to spin.  They are all carefully arranged into bread baskets and then shrink wrapped.  I finish off all of my baskets with a little blank card that can be addressed to the recipient and for that added homemade touch, I crocheted star ornaments from some of my own handspun.  These go on the outside along with a yarn bow.  Actually, the Star Ornament Pattern is available here for free. 

That's only three of the seven gift basket themes, but I'm starting to wear out tonight.  I'll share the rest tomorrow.

Sunday, January 8, 2017

You Have to Start Somewhere

As far as blogging goes, 2016 was my lost year.  As far as everything else goes, it was actually pretty cool.  My sons grew ever more independent and impressive in their older teen years.  A wedding brought my whole family together as weddings do.  I did my fair share of crocheting and designing.  My biggest project being my Solomon's Knot Drape Front Vest.   I also decided to focus on learning how to play the guitar which I have owned for over 25 years.  All in all, 2016 was a year full of the richness that life offers.  

One of the biggest changes for me was when I somehow decided that I was going to get into better shape.  More than decided really.  Have you ever had that experience when something kind of crosses over in your mind and you know that you are actually going to accomplish your goal because you just do?  I had one of those. 

It started at the beginning of September when, feeling guilty about being rather lazy over the summer, I decided to get back to exercising.  Now, here on the outskirts of Phoenix, September is still crazy hot, so after one walk, I was already feeling defeated.  Then two things happened.  First, my sister-in-law shared this very fun looking video on facebook of The Fitness Marshall doing a short cardio hip-hop workout.


My first thought was, "Hey, I could do this inside!"  So I went over to The Fitness Marshall's YouTube channel, picked out enough videos to make an hour long playlist, and decided to hip-hop my way to being more fit.

Right about the same time, my oldest son, who was already back at college, tells me about this app he's using and gets me to sign up on My Fitness Pal.  I put the app on my phone, friend my son so we can be fitness buddies, and I was off.  Something about the combination of finding a fun exercise routine and tracking it in a diary along with my calorie intake just clicked for me.  I never thought I'd be a calorie counter, but it really helped me to monitor and be mindful of my diet.  

Flash forward to present day and I have logged onto the MyFitnessPal app for 127 days in a row.  I went from cardio hip-hopping to kick boxing and now I'm using a body weight bootcamp video and I've started running.  I've lost 38 pounds, donated more than half my wardrobe to charity and I kind of don't even know what size I wear right now because I'm still getting used to this smaller me. 

It's weird to say all of that in a nutshell because its been such a long journey with sweat and sore muscles and feeling like I can't lose another pound no matter what I do (the lows) and being elated when the scale rewards me with a nice little drop (the highs).  

I haven't reached my weight loss goal as of yet, so the journey is ongoing.  Aside from losing weight, I'm really focusing on strengthening my core and upper body.  I want to slim down, but I want to feel strong at the same time.  

I'm 15 pounds away from my ultimate goal.  The more weight I lose, the harder it seems to be to keep losing.  I keep having to up my exercise and be ever vigilant about my diet.  If you are out there trying to be a more fit version of yourself, I'm right there with you! If you would like to buddy up on MyFitnessPal, my username is fiberpunk.  I've just started giving myself Sundays off, so tomorrow, it's back to the mat!

Oh yes, and Happy New Year!


Tuesday, December 22, 2015

Hat Parade!

This fall I was asked to teach a crochet class to a group wishing to crochet for charity.  This put me into a frenzied state of hat design.  I started by actually writing up a pattern I've been making for 10 years.  It's the one I have pictured here in the upper left hand corner and it's called The Portland Beanie.  This is a great go-to beanie pattern using DK or light worsted weight yarn.  It looks terrific in solid colors and can be stunning made up in colorful hanspun.  

After finishing that write-up, I decided it would be nice to be able to make a similar hat only in heavier weight yarn.  They would make up quickly and so could be produced on a larger scale for charities.  The Thick and Quick Portland Beanie is the result of that effort and is pictured on the center left.   This pattern uses heavy worsted weight yarn and offers three different sizes great for growing youth to adult and also includes the Little Hat Flower Pattern for free.  

I wasn't quite done with my Portland Beanie stitch.  Once I started designing, I couldn't stop.  The next pattern I made was The Portland Beret. In this pattern I used a sport weight, variegated yarn.  It's pictured in the lower left corner.  It can be worn slouchy style as shown here or it can be worn like a traditional beret.   

After the Portland Beret was complete, I wanted to make an actual slouchy with that exaggerated poof in the back.  I used a worsted weight yarn and created The Portland Slouchy in in the last two pictures of the right column.  This one is my new favorite.  It's comfortable and can be worn all day as a stylish accessory.  It seems to look great on any shaped face or with any hairstyle.  So versatile!

Once I had a hat for all of these different yarn weights and in a fun variety of styles, I had one thing left on my list of hats to make and that was a The Baby Beanie.   It's in the upper right hand corner in blue, but of course it could just as easily be made in pink or any other color of the rainbow.  In this design, I use single crochet stitches for a beanie that will hold in warmth.  The pattern comes with instructions for the tassel topper you see here and a flower option.  I gave it a rolled brim so it can grow with baby for at least a few weeks.

This is what happens to me when I'm asked to teach a class.  I've always been one to over prepare.  These short periods of prolific design are fulfilling, but it's probably good that I don't teach regularly.  I fear all other aspects of life would suffer.  I have even one more hat that I designed this fall, but I'm saving that for another post.  This fall was a veritable parade of hats, hats and more hats!

Wednesday, October 21, 2015

Crochet Covered Storage Tin

It's my birthday and what am I doing?  I'm yarn bombing a 6oz tin just for the fun of it.  I might be getting one step closer to a tea cozy crocheting stereotype, but I love making things out of yarn enough that I don't even care. 

I finished off a 6oz tin of almonds the other day and couldn't bring my self to throw it away.  There are so many bits and pieces in the crafting that I do, so why not hold onto a perfectly good storage item?  


Flashback to my father saving baby food jars for his workshop.  He would screw the metal tops to the bottom of a shelf and then screw on the little glass jars.  This way he could see and keep organized his smaller hardware pieces.  Genius!

The thing is, how can I allow something so plain as a tin to enter Wind Rose Fiber Studio?  Somehow, always, fiber must get involved!  So I grabbed a bit of leftover yarn, I think this is a Noro silk and wool blend, and started making a cover.  The wonderfully colorful Noro was definitely an improvement, but I thought it still needed a little something.  That's when I got the idea to make a classic storage container label slot.  Three sides are sewn onto my cover and the top is open so I can label the contents of my tin. 

Now it's a proper yarn lovers storage container and pretty cute if I do say so myself. Wouldn't a little grouping be fun together?  It could also be cute to decorate a gift tin of cookies.  

I don't think you need instructions for this one.  I've hardly invented the cozy here.  In the way of guidance, I started with a basic 6 stitch circle (working in the round with H hook and in sc) which I increased in circumference until it matched the bottom of the tin (42 sts).  Then I did a round in the back loops only without increasing to form the bottom rim.  I continued on with the same number of stitches in the round until it reached the height of my tin.  I slip stitched one final row around to give it a nice edge.  I covered the bottom of my tin in Weldbond to keep the cover in place.  I don't really think the sides need glueing.  

For my label cover, I chained 17, I single crocheted in 2nd ch from hook and in the next 4 sts, 3 in next st for 1st corner, sc in next st and then 3 sc in next for 2nd corner, sc in next 5 stitches, then 3 sc, sc, 3 sc over the last three sts to create 3rd and 4th corners, join with sl st to first sc, finish off sewing the edges together as you weave in those ends.  I whip stitched it onto my cover with needle and thread and there you have it. 

I guess I basically just wrote a pattern after all.  Of course you can keep the top that came with the tin.  That could also be yarn bombed if you too abide by the notion that everything is better when covered in yarn. 

Monday, October 19, 2015

The Regensburg Scarf Revisited

Last night I was in the mood to crochet a little something as I wound down for the day. I wanted something familiar, so I chose one of my own designs.  I'm always promising myself that I'll revisit my patterns to see if I think they are holding up over time.  The more pattern writing you do, the better you get, so it makes sense to go back to earlier patterns and do a little editing.  

The pattern I picked is called The Regensburg Scarf.  I wrote it back in 2011 after a trip to Germany including the town of, you guessed it, Regensburg.  It wasn't any scarf in particular that inspired me.  It was the fact that people were wearing scarves all the time and everywhere.  The scarves were almost always the wrap around style where you bring the ends forward and they seemed to become part of an outfit, more like a necklace than a utility.  

https://www.etsy.com/listing/78919415/the-regensburg-scarf-pdf-crochet-pattern?ref=shop_home_active_17
The reason why I wanted to share this pattern here again today, is because it's pretty unique.  I was reading over it last night and even found myself watching the companion video I made four years ago.  I had a strange moment of wondering how I came up with this because it's different than anything else I've designed and it's just kind of fun to do something a little different.  

Slowly my thought process came back to me.  I know I liked the idea of working the fringe in as you crochet.  I've always liked the idea of one uninterrupted thread creating an entire piece.  I also made up a ruffle.  I saw a lot of ruffles in Germany as well, so I wanted to make a crocheted scarf with ruffles.  I wanted more than the texture from a popcorn stitch or something similar.  I wanted an actual ruffle. 

So if you find yourself in the mood to crochet something with a couple of unique elements, The Regensburg Scarf is a fun and relatively quick project.  I think you'll enjoy the process, and if you're like me, you'll start thinking about what other designs you can make with a built in ruffle or fringe. 

Tuesday, April 7, 2015

Ack! Pattern Writing! Ack!

Tall Muk Luk shell waiting for a sole and top trim.
Sometimes it's nice to have a blog so you can share the sheer "ack" of it all!  Writing my Tall Muk Luks pattern was making me crazy.  I always knew that it would be challenging to write this design  in a concise and approachable way.  Well, I was right.  

As you know, legs and feet come in all shapes and sizes.  Attempting to accommodate as many as possible has really added to the ack factor.  A little over a week ago, I got so frustrated that I just walked away.  I told myself that it was because I had to pay my taxes and take a road trip to my son's college.  Both were true, but not really the reason I was avoiding my crochet hooks. 

I can only write about this now because I seem to have overcome my stumbling blocks.  Everything is falling neatly into place and all I really have left to do is to make a test pair of each size.  I also need to take some pictures which means finally bonding with my new Nikon 3300.  This will certainly lead to another vent-tastic blog post.  Stay tuned...

Sunday, March 15, 2015

The Tall Muk Luk Pattern - Progress Report

This is what my work space looked like at ten o'clock last night.  You'd never know by this pic that I'm kind of a neat-nick, but when I'm in the midst of working on a design, things can get pretty messy.  In the case of these muk luks, I've got more yarn on hand than usual because I'm writing the pattern to fit multiple sizes.  This means experimenting with yarn weights plus various hooks which equals more stuff.

The good news is that I'm making some real progress.  I'm writing this blog post to propel myself forward as much as anything else.  When you are all alone in a studio you have to be your own cheerleader.  Go! Jenn Go! 

Wednesday, February 25, 2015

The Tall Muk Luk Pattern - It's Really Happening!

It's a sunny afternoon and I'm on my back porch (my happy place) working on the tall muk luk pattern.  It occurred to me that I should take a picture lest you think I've forgotten or that I'm flaking out.  Never!  In fact, in the past week, I've had two more people comment on older posts asking for this pattern.  The requests keep coming and frankly, they are keeping me motivated. 

I'd love to tell you I'm halfway there, but the truth is, I'm off to a slow start.  It has been several years since I've even made a muk luk so I can't help but play around a little and see if I want to change anything.  For instance, on the crochet along that I published back in 2010, I used a size K crochet hook.  That's a pretty big hook and so I've been experimenting with smaller ones.  Here I have a sole crocheted in a size I (gray) and in the original K (red).  I like the look of the gray sole.  The stitches are smaller and less airy which means warmer too.  On the other hand, the K hook makes up quicker and the soles will eventually be covered with suede or some sort of fabric and will thus be plenty warm.  I think what tilts the table in red's favor, or size K, is that the fabric has more stretch and will be more comfortable I think.  The stretch factor also helps when designing multiple sizes for all of those unique footsies out there.  

So this is me, checking in to let you know that I am following through on the long awaited tall muk luk pattern.  I'll keep you updated with my progress.  Hope your day is sunny too!

Friday, February 13, 2015

Oh Those Muk Luks!

Hi there and happy almost Valentine's Day.  I've been thinking about my muk luks today.  I began sharing muk luk stories the very first year of this blog.  That was 2008.  I actually blogged about them twice that year including an Ode To Muk Luks.  Then in 2010, I decided to share the shorter muk luk pattern in a photo tutorial crochet-along. A handful of people joined me and it was fun to make them in real time with others sharing their feedback and finished muk luks. I put more time into that tutorial than just about anything I've done here on the Wind Rose blog, and when it was done, I felt satisfied and moved on to others projects.  

Since that time, I have felt surprised and grateful to have more and more visitors come for the muk luk pattern.  It led to the making of several YouTube support videos for people who wanted even more of a visual aid.  In addition, I have had quite a few people ask for the tall muk luk pattern.  I have been hesitant and have said as much in comments.  It's not that I don't want to share the pattern, it's that I know how involved this pattern is and how much time it will take to create.  

I'm writing about these dear old muk luks again today, because when I put something in writing, I am sure to follow through.  I have decided to commit to writing the ultimate muk muk pattern.  I'm using the word ultimate because I plan to include both the pattern for the short and the tall muk luks.  In addition, I'll be writing the patterns in small, medium and large sizes and I'll do my best to address all of the questions I've received over the years.  When complete, this pattern will be available as an instant download pdf through my shop.  I will be sure to make announcements here when the time comes.  I will continue to offer the existing tutorial for free, but the complete pattern will be sold for a reasonable price.  I know, free is awesome, but this one is going to be a big project for me, so I hope you understand.  

So this is it!  This is my commitment to finally write the tall muk luk pattern and to revamp the short pattern.  I'm sorry it's taken me so long, but I hope it will be worth the wait!

Wednesday, February 4, 2015

Ducky Appliqué Crochet Pattern - It's New!

This is starting to look like the year of the appliqué.  First there was the Folk Art Heart and now there's a Ducky.  Have I gone mad?  Or worse, have I gone cutie patootie?

I guess there's nothing else to do but own it.  Yes, I designed this little yellow ducky.  I didn't actually wake up one morning with the burning desire to design a duck.  During a recent visit, my mom asked me if I could make one.  She was working on a baby blanket that called for a row of ducks.  The way in which the ducks were to be knitted into the fabric was difficult and so my mother decided to hire a duck woman.  That's me.

 I've never been one to reinvent the wheel, so the first thing I did was jump on Pinterest.  I figured that there were probably some crocheted duckies out there, and though there were, none were quite right.  I was going for more of that classic rubber ducky shape.  After a few false starts, I put down my crochet hook and picked up a pencil.  Once I had a drawing I liked, the rest came easily.  Basically, if I can draw it, I can crochet it.  I guess that's my process.


If you find yourself in need of a Ducky Appliqué pattern, I am adding this one to the mix.  The yellow ducky was made using some of my own handspun, hand dyed yarn.  Then I mused that a brushed mohair ducky would be fairly adorable.  See, I have gone cutie patootie!  I will call him Fluffy.

Friday, January 16, 2015

Design Decisions

Yesterday I was making a few more of my Folk Art Hearts when I became agitated by one of my own design choices.  "Why did I do that?" I asked myself, and "Wouldn't it look better this way or this other way?"

The "that" I was referring to is these four stitches that I've circled in white.  Why did I make them yellow and not green?  Or better yet, why didn't I keep carrying on with the spiral design in which case they would be red?

All of the sudden, this pattern that I had been perfectly happy with, became a source of anxiety.  I could not move on until I explored the other obvious design options.  In the moment, it seemed that making each section an obvious and separate field of color would look more striking.  

I stopped what I was doing and made a heart in which the four stitches in question were green.  That didn't look right to me as it seemed to be too much a break in the spiral pattern.  I ripped it out and carried on with the spiral.  While this was a bit better, it still felt off.  I missed having the spiral shape completely framed in green.  

In the end, after spending at least an hour going back and forth and back again, I decided that the original design was in fact the most appealing.  It was more interesting to have the colors sort of bleeding into one another as opposed to three separate parts.  

The reason I'm sharing this minor freak-out is because I think it's interesting how many decisions go into even the smallest design.  A lot of time and effort can go into something as simple as a heart.  I confess that I am guilty of looking at a finished product and thinking that I could make that in a cinch.  Of course it's easy to think that when you are looking at the completed effort and all of the design decisions have already been made.  Next time I find myself thinking such prideful thoughts, I will remember this humbling little heart.